
Finally, I’m back! As promised, here’s a tutorial on how to make your own audio files for Shichida speed reading and listening home practice.
Though this may seem a little techie at first, once you get the hang of it, it’s really very simple. Then you can easily create audio files for speed reading / listening or convert existing audio files for speed listening. Give it a try!
(A) Create New Audio Files in Normal & High Speeds
Step 1: Download the free Audacity software at http://audacity.sourceforge.net/download/
Step 2: Create your audio file in normal speed (1x)
- Go to a quiet room. (For me, it’s when the kids are asleep at night. If possible, turn on the air-con instead of fan to prevent background noise.) Lay your script in front of you.
- Run Audacity
- Use a microphone or turn the computer’s volume to the highest possible
- Click the Record button (a red circle) and start recording
- If you’ve made a mistake, it’s ok. Pause for a short while, and continue recording.
- When done, click the Record button again to stop recording
- Highlight the portions that you don’t need (e.g. extra pauses, mistakes) and press “Delete”
This is a screenshot of Audacity when I’m done recording and editing:

- Go to File –> Save Project –> Choose a filename such as “XYZ Speed 1x” –> Save (This will be a .aup file, for opening and editing in Audacity)
- Go to File –> Export –> Choose a filename such as “XYZ Speed 1x” –> Save (Choose a file format that your computer can recognize. E.g. .wav, .MP3, or .M4a for Apple iTunes) (I use .M4a for playing in Apple iTunes. You may need to download a converter to do so. Follow the screen instructions if needed.)
This is a screenshot of Audacity when I’m exporting into .M4a format:

Step 3: Convert your audio file into high speed version (2x)
- Continue from above
- Go to Effect –> Change Tempo –> In the box, at “Percent Change”, type 100 –> Ok
- Go to File –> Export –> Choose a filename such as “XYZ Speed 2x” –> Save (Again, select a suitable file format.)
Step 4: Convert your audio file into high speed version (4x)
- Continue from above
- Go to Effect –> Change Tempo –> In the box, at “Percent Change”, type 100 –> Ok
- Go to File –> Export –> Choose a filename such as “XYZ Speed 4x” –> Save (Again, select a suitable file format.)
Step 5: Convert your audio file into high speed version (8x)
- Continue from above
- Go to Effect –> Change Tempo –> In the box, at “Percent Change”, type 100 –> Ok
- Go to File –> Export –> Choose a filename such as “XYZ Speed 8x” –> Save (Again, select a suitable file format.)
- Close Audacity, click “No” to saving changes. This way, your .aup file remains at Speed 1x
Congrats, you’re done!
Samples
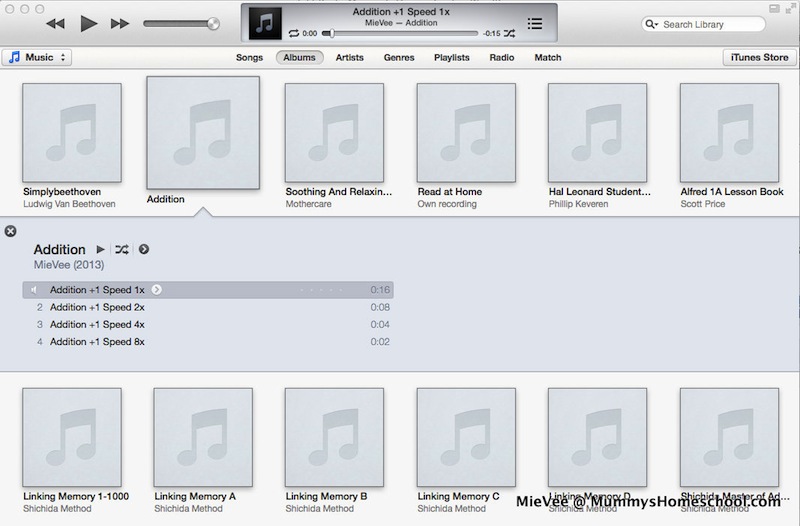
Here are the sample files of “Addition +1 Equations” that I’ve recorded:
Addition +1 (Speed 1x):
Addition +1 (Speed 2x):
Addition +1 (Speed 4x):
Addition +1 (Speed 8x):
(B) Convert Existing Audio File into High Speed Versions
If you’ve successfully recorded your audio files following the above steps, this part will be a breeze! This method is more advanced than the previous tutorial on increasing playback speed using VLC.
The advantages: It allows editing, increasing playback speed to 8x (or even more!) and saving the higher-speed files for convenient playback and looping. Definitely worth the effort!
Step 1: Save a copy of your existing audio file (You won’t want to mess up your original audio file!)
Step 2: Import the above copy into Audacity (Go to File –> Import –> Audio. Choose your file. Your file will be converted into .aup format.)
Step 3: Ensure the audio file is at “Stop” mode, not “Pause” mode
Step 4: Convert your audio file into high speed version (2x)
- Go to Effect –> Change Tempo –> In the box, at “Percent Change”, type 100 –> Ok
- Go to File –> Export –> Choose a filename such as “XYZ Speed 2x” –> Save (Again, select a suitable file format.)
Step 5: Convert your audio file into high speed version (4x)
- Continue from above
- Go to Effect –> Change Tempo –> In the box, at “Percent Change”, type 100 –> Ok
- Go to File –> Export –> Choose a filename such as “XYZ Speed 4x” –> Save (Again, select a suitable file format.)
Step 6: Convert your audio file into high speed version (8x)
- Continue from above
- Go to Effect –> Change Tempo –> In the box, at “Percent Change”, type 100 –> Ok
- Go to File –> Export –> Choose a filename such as “XYZ Speed 8x” –> Save (Again, select a suitable file format.)
- Close Audacity, click “No” to saving changes. This way, your .aup file remains at Speed 1x
Congrats, you’re done!
—
How to use the audio files
I like to use iTunes to manage and sync my audio files across gadgets (Apple laptop, iPod Touch, iPad), so that I can play the required audios anytime, anywhere convenient.
1. For speed listening with no material on hand
E.g. Audio books, mathematical songs, linking memory stories
- Play the audio file in the background (soft volume is fine, as long as it’s audible) when the child is playing quietly, having meal or on the road. This facilitates subconscious learning.
- Some variations: (a) Play at Speed 1x, then 2x, then 4x (b) Loop at 1x or 2x or 4x
- Stop when the child wants to
2. For speed reading / speed learning with material on hand
E.g. Story books, math flashcards, linking memory stories
- Refer to the material
- Some variations: (a) Play at 1x, then 2x, then 4x (b) Loop at high speed, e.g. for 3 times
- Stop when the child wants to
Have fun doing Shichida home practice!
—
P.S. You may download the Addition +1 files below:
P.P.S. Too busy to make home practice materials? Go to:
 *
*
—
Disclosure: Mummy’s Homeschool™ is an information site that receives compensation if readers make purchases from affiliate links (these are marked with an *). If we receive compensation from the companies whose products we review, this would be disclosed. These compensation help to maintain and grow Mummy’s Homeschool™. We test each product thoroughly and give ratings according to our experience with it. We are independently owned and the opinions expressed here are our own.
Pingback: Shichida: Review & FAQs Answered
Thank you for writing this blog. May I know the audio for the speed reading – linking memories home practise with x1, x2 and x4 is the whole story or just the word relevant to the picture? Like a rabbit jumps over a house which smile like a strawberry… The fC are Rabbit, House, Strawberry. Then the audio will be “a rabbit jumps over a house which smile like a strawberry”? So have to flash 3 times with different speed?
Hi Bee Leng, for linking memory, the audio consists of both story and items, in various speeds.
Example:
Track 1. a rabbit jumps over a house which smiles like a strawberry (Speed x1)
Track 2. a rabbit jumps over a house which smiles like a strawberry (Speed x2)
Track 3. a rabbit jumps over a house which smiles like a strawberry (Speed x4)
Track 4. rabbit, house, strawberry (Speed x1)
Track 5. rabbit, house, strawberry (Speed x2)
Track 6. rabbit, house, strawberry (Speed x4)
My Shichida CDs for advanced age (>5) has speeds x8 and x16 as well.
If it’s a new story, I’ll use x1, followed by x2.
If not a new story, then x2 and above.
Flashing is done at x1 or x2. Quite impossible to flash at x4 and above. For these high speeds, can simply play without flashing. Can even be in the background when child is playing quietly. When the child has built an excellent memory, he can eventually ‘see’ the pictures in his mind without needing the cards.
Also, observe your child’s learning style and preferences for materials.
Hope this helps. Have fun! 🙂
Hi Mie Vee
Can you elaborate more on this about flashing linking memory?
I used a new set of 10 cards for my 3 yrs old son.
So , if for new stories.. (
I say
Track 1. a rabbit jumps over a house which smiles like a strawberry (Speed x1)
Track 2. a rabbit jumps over a house which smiles like a strawberry (Speed x2)
Track 4. rabbit, house, strawberry (Speed x1)
Track 5. rabbit, house, strawberry (Speed x2)
IS that right?
If you have old stories , do you mean you repeat the same set of 10 cards again the next day? Is it recommended to repeat?
Regards
Lynn
Hi Lynn, your sequence for introducing linking memory is fine.
It is fine to repeat linking memory story cards the next day, if the child still needs practice and is happy to go along.
If the child is rather familiar with the cards on Day 1, then on Day 2, you may introduce only new cards.
As for linking for e.g. 50 cards at the end of a story, it depends on when the child is ready to properly handle a big number of cards. Some may get a bit overwhelmed or overexcited.
Hi Genevieve, please let me know via email if you need more info.
Thank you so much for replying me… Now, I have a better picture…
Me again. May I know how to implement set 2? Now, my son is 27 months. Currently, I starting with 5 cards and then slowly increase by adding 1 card in. Now, he can manage to arrange 10 cards. So I would like to add in another set, which also contains 10 cards. Do i need to retire the set 1? or add together?
I did this with Vee at about 3 years old: do 10, then retire and new set of 10 cards. At the end of entire story, give him cards in separate packets of 10. Let him arrange row by row. If he can & wants, all 50 cards shuffled for arranging. Happy practising! 🙂
Thank you so much. After using ur method. normal speed and x 2.. my son more interest in playing this games ^^
You’re most welcome; I learnt this from Shichida books and classes. Glad that it works! 🙂
Pingback: Shichida Speed Reading: How to increase playback speed of audio files
Hello Mievee,
Huge thanks for the current blog,it’s of great use to me)) I do home practice with my child 1,5 years old but we only do ESP ,memory grid,linking memory and puzzles,and preparational actor it’s of course. Now I intend to start imaging and speed listening. Could you explain me the point of speed listening? Is it just a way to put any information into child’s head or is it a way ti increase memory like FLASHCARDS? Because I want to record something -but I don’t know what)))thank you))
Hi Elizabeth, thank you for reading my blog! According to Prof Shichida in one of his books, audio memory is much more powerful than visual memory. Speed listening helps one to learn via the right brain through audio instead of visual. It also helps in recitation. Recitation is a form of drawing out the output.
Drawing out the output helps the child to retain the ability. Usually, this is from 3-6 years onwards.
(The right brain is activated by high speed input, that’s why flashcards need to be fast and audio files are sped up.)
When the child is used to listening to sped-up files, he won’t find it that fast.
If you wish to record something, some suggestions:
– short stories
– math facts (addition, multiplication)
– periodic table
– poems
Have fun!
Hi MieVee
Can this speed listening apply in picking up a new language? I am thinking to expose my 4 yr old son to Japanese language. He is able to sing songs from U tube and Korean dramas (he watches with me daily), so I believe speed listening works. But is it important to teach him the lyrics eg. for Chuggington song?
Is speed listening also for multiplication table? Is it important to show him the visual + audio for multiplication?
Looking forward to your views
Hi Raine, yes, speed listening can be used for learning a language too.
In “teaching lyrics”, do you mean teaching him how to read the lyrics? Usually, we sing and speed-sing too without looking at lyrics. This enables us to move our body and hands, which helps in memorising too.
Certain songs, I may print the lyrics on flashcards and flash with the song.
For longer songs like “Let it Go”, we referred to the printed lyrics on A4 paper for a while. Now we’ve memorised the whole song.
Yes, speed listening can work for multiplication table too. I show flashcards (visual + my voice). During play time, I may play the tracks in the background, looping for a while. Here’s my printable: Multiplication Flash Cards
Hi, can share the topics for math’s speed audio? am i right that addition +2 is the same as multiplication of 2?
Math: You may create +1 to +10
That is 1+1=2 until 9+10=19. Or any range you like.
Multiplication is the tables from x1 to x9 or even x12.
1×1=1 until 9×9=81 or 12×12=144